Contents
- 1 Noisy Bicycle Disc Brakes
- 2 Rotor Truing Fork
Noisy Bicycle Disc Brakes
The Annoying Squeak
You’re gliding down the road, the wind in your hair, everything feels perfect—until you hit the brakes. Instead of a smooth, silent stop, you’re met with that dreaded, high-pitched squeak. It’s the kind of sound that makes pedestrians wince, your fellow cyclists give you side-eye, and, let’s be honest, your blood pressure spike a bit.
Squeaky bicycle disc brakes aren’t just annoying—they’re a cry for help from your bike. It’s your ride’s way of telling you something’s off. Sure, you could ignore it, but why subject yourself and everyone around you to that shrill soundtrack?
Plus, a squeaky brake often signals a deeper issue that, if left unchecked, could affect your stopping power. And when it comes to cycling safety, there’s no room for compromise. So, let’s dive into why this happens and how you can silence those brakes for good.
Why Do Bicycle Disc Brakes Squeak?
You might be wondering, what exactly is causing that ear-piercing noise? The truth is, there’s no one-size-fits-all answer. Several factors can contribute to those squeaks, and it’s usually a combination of them that’s the culprit.
First up, rotor contamination. Your disc brakes operate in the real world, where dirt, oil, and other grime can easily find their way onto your rotors and pads. When these parts get contaminated, friction doesn’t happen the way it’s supposed to, leading to that high-pitched squeal. Imagine dragging your nails across a chalkboard—that’s essentially what’s happening on a microscopic level.
Then there’s disc brake alignment. Your brake calipers need to be perfectly aligned with the rotors for smooth operation. If they’re even slightly off, the pads can rub against the rotor unevenly, causing that grating noise. It’s like trying to play a record with a misaligned needle—you’re going to get some unpleasant feedback.
But that’s not all. Brake pad wear is another common cause. As pads wear down, they lose their ability to grip the rotor effectively, leading to noise. It’s like trying to stop a car with bald tires—sure, it’ll stop eventually, but not without a lot of screeching.
Lastly, humidity and temperature changes can also be a factor. In damp conditions, moisture can cause a thin layer of rust to form on the rotors, which quickly leads to noise when you hit the brakes. On the flip side, extreme heat can cause brake pad glazing, creating a hard, shiny surface that doesn’t grip the rotor as well, leading to—you guessed it—squeaks.
Identifying the Source of the Squeak
Visual Inspection: What to Look For
Before you start tinkering with your bike, it’s essential to give those bicycle disc brakes a good, thorough look. Brake pad inspection is your first line of defense in identifying the root cause of that obnoxious squeak. Think of it as detective work—you’re searching for clues that might explain the noise.
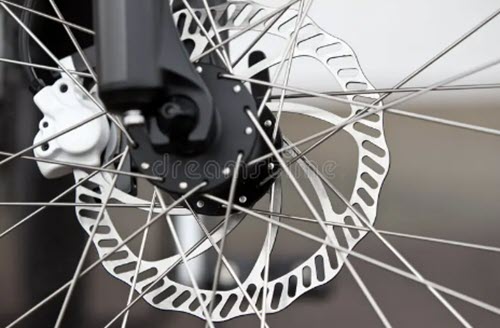
Start by examining the rotors. Are they clean, or do you notice any streaks, discoloration, or buildup? Dirt, oil, or even a thin layer of rust can all lead to squeaks. A rotor should have a smooth, even surface. If you spot any gunk or shiny patches, that’s a red flag.
Next, check out the brake pads. If they’re unevenly worn or look glazed over with a hard, shiny surface, it’s a sign that they’re not gripping the rotor properly.
In some cases, you might even see contaminants like small particles embedded in the pads—another potential cause of noise in bicycle disc brakes. Hold the brake lever lightly and see if the pads touch the rotor evenly. Misalignment can lead to uneven pressure, which is a common cause of that high-pitched sound.
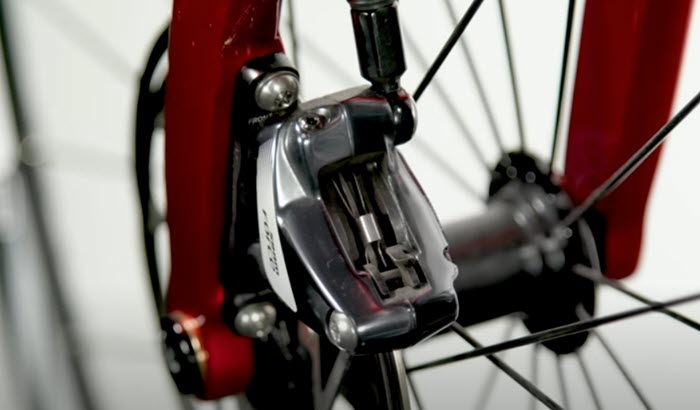
While you’re at it, take a look at the calipers and bolts. Are the calipers centered over the rotor? If they’re off-kilter, it could be causing one pad to drag against the rotor. Loose bolts can also create vibration and noise, so make sure everything is snug.
The Listening Test: Pinpoint the Problem
Sometimes, a good listen is just as important as a good look.
The squeak your brakes are making isn’t just noise—it’s a language, telling you exactly where the problem lies. The trick is learning to interpret it.
Start by slowly spinning the wheel and applying the brakes gently. Listen for where the noise is coming from. Does it happen immediately, or only when you apply more pressure?
If the squeak starts as soon as the pads touch the rotor, it’s likely an alignment issue or contamination. A delayed squeak might point more towards pad wear or glazing.
Try to differentiate between a high-pitched squeal and a lower, grumbling noise. A sharp, screechy sound often indicates contamination or metal-on-metal contact, while a lower pitch could be the result of uneven wear or misalignment.
If you’re still unsure, try the old-school approach: ride your bike in a quiet area where you can hear the brakes clearly. Apply them lightly and then harder, listening for changes in the sound. The variation in noise can give you valuable clues about what’s going on inside those calipers.
Quick Fixes for Squeaky Bicycle Disc Brakes
Cleaning the Rotors: The First Line of Defense
So, you’ve pinpointed the source of the squeak. Now, it’s time to roll up your sleeves and dive into the first line of defense—brake rotor cleaning. A little elbow grease can go a long way in banishing that annoying noise.
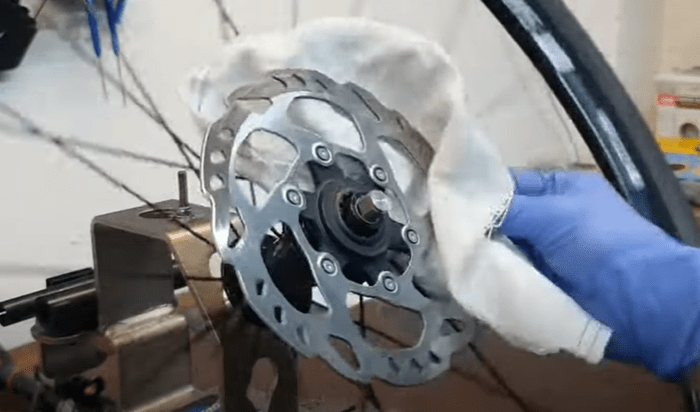
Rotors are the heart of your braking system, and keeping them clean is crucial. Start by removing the wheel so you can get a good look at the rotor. You’ll want to wipe down the rotor with a clean, dry cloth to remove any loose debris.
Next, grab a microfiber cloth and some warm, soapy water. Gently scrub the rotor in a circular motion, making sure to cover the entire surface. This will help lift any stubborn dirt, dust, or grease that’s clinging on.
After you’ve given the rotor a good scrub, rinse it off with clean water and dry it thoroughly. Don’t forget to inspect the rotor for any stubborn spots—if you see any, give them another pass with the soapy water. When dealing with bicycle disc brakes, it’s important to make sure the rotor is completely dry before reassembling your wheel. Moisture can lead to rust and, you guessed it, more squeaks down the road.
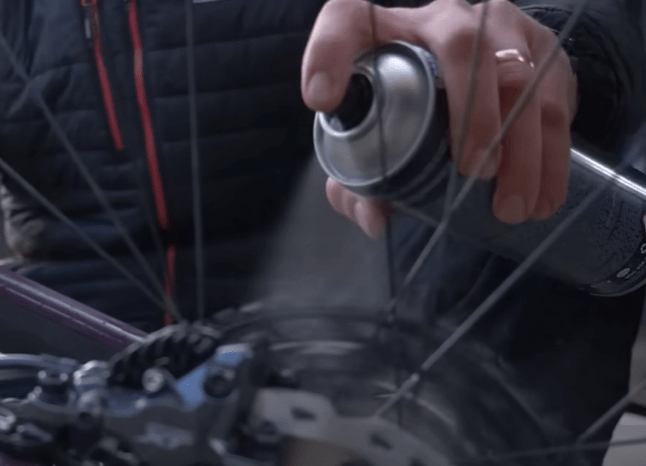
For a deeper clean, you can use a dedicated bicycle disc brakes cleaner. These cleaners are designed to remove contaminants without leaving any residue. Just spray it on, let it sit for a few seconds, and then wipe it off with a clean cloth. It’s an easy, effective way to get your rotors looking and performing like new.
The Power of Isopropyl Alcohol
When it comes to cleaning your bicycle disc brakes, there’s a secret weapon that every cyclist should have in their toolkit: isopropyl alcohol. This common household item is your best friend when it comes to cleaning brake parts, and it’s especially effective for rotors.
Isopropyl alcohol is excellent at cutting through oil, grease, and other contaminants that can cause your brakes to squeak. The best part? It evaporates quickly, leaving no residue behind. That means your rotors are left perfectly clean, with nothing to interfere with the pads’ grip.
To clean your rotors with isopropyl alcohol, simply pour a small amount onto a clean cloth and wipe down the rotor. Work your way around the entire rotor, ensuring you cover every inch. If the cloth comes away dirty, don’t be afraid to use a fresh one and go over the rotor again. The goal is to remove every bit of grime.
After cleaning the rotors, let them air dry for a few minutes. Although the alcohol evaporates quickly, giving it a little time ensures that any lingering moisture is gone. If your brake pads are also dirty, you can use isopropyl alcohol to clean them as well. Just be sure to remove the pads from the calipers before you start.
Adjusting the Brake Calipers for Silence
Aligning the Calipers: Get It Right
Once your rotors are sparkling clean, the next step is to ensure your brake caliper adjustment is spot on. Misaligned calipers are a notorious source of squeaky brakes. They can cause the brake pads to rub against the rotor unevenly, leading to that grating noise that drives you (and everyone else) up the wall.
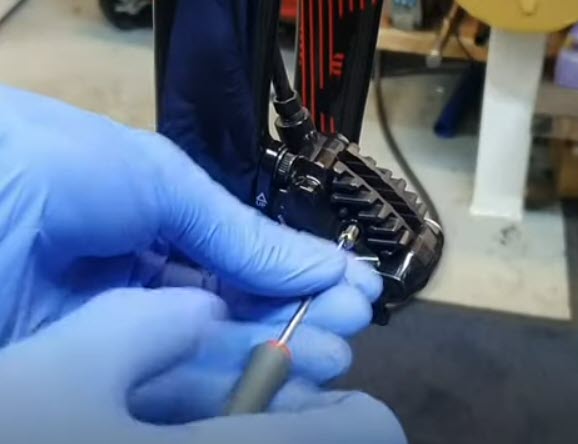
Aligning your calipers might sound technical, but it’s simpler than you might think. Start by loosening the bolts that hold the caliper in place—just enough so that the caliper can move freely, but not so much that it’s wobbling around. Now, squeeze the brake lever tightly. This action centers the caliper over the rotor, aligning the pads perfectly on either side.
While keeping the brake lever squeezed, carefully tighten the caliper bolts back down. This part is key: when working with bicycle disc brakes, tighten the bolts evenly and gradually, alternating between them to keep the caliper from shifting out of alignment.
Once everything is snug, release the brake lever and give the wheel a spin. The rotor should glide smoothly between the pads without any contact. If you still hear a slight rub, don’t panic—just repeat the process. It might take a couple of tries to get it just right, but once you do, your brakes should be much quieter.
Tightening Loose Components
Even the most precisely aligned calipers can cause noise if the surrounding components aren’t properly tightened. A single loose bolt can introduce vibration, which often results in that dreaded squeak. The good news is that tightening everything up is a quick and easy task that can make a world of difference.
Start by going over all the bolts on your braking system. Use a torque wrench if you have one, as this ensures that each bolt is tightened to the manufacturer’s specifications.
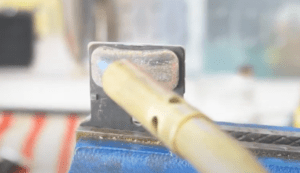
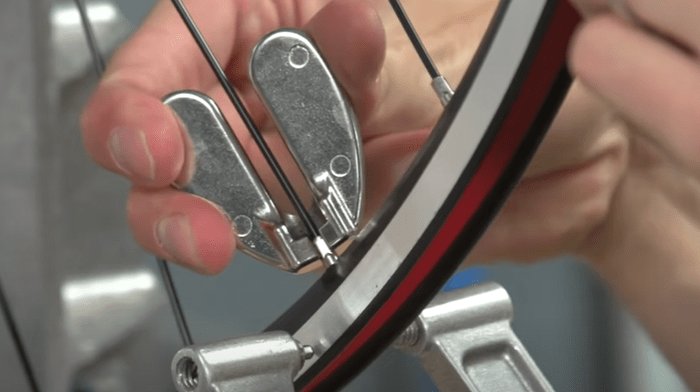
Rotor Truing Fork
Pay particular attention to the caliper mounting bolts, rotor bolts, and the bolts securing the brake levers to the handlebars. They should all be snug, but not overtightened—too much force can strip the threads or warp the components.
Don’t forget to check the brake pads themselves. If they’re not securely seated in the caliper, they can shift slightly when you apply the brakes, leading to noise. Give them a gentle tug to make sure they’re locked in place.
Finally, take a moment to inspect your brake cables or hydraulic lines (depending on your setup). Ensure they’re properly secured and not rubbing against the frame or any other components. Even a minor misplacement can lead to unwanted vibration and noise.
Brake Pad Maintenance: Keeping It Clean and Quiet
Inspecting the Brake Pads for Wear and Tear
Your brake pads are the unsung heroes of your bicycle’s braking system. They endure immense friction every time you squeeze the brake lever, gradually wearing down with each ride. Over time, this wear and tear can lead to that familiar, irritating squeak. But not every squeak means it’s time for brake pad replacement—sometimes, they just need a little TLC.
Start by removing the brake pads from the calipers. Most pads can be easily slid out after you remove the retaining pin or clip. Once out, give them a thorough inspection. You’re looking for a few key things: thickness, uniformity, and cleanliness.
If the pads are worn down to the metal backing plate, it’s time to replace them. Continuing to ride with worn-out pads not only increases noise but also reduces your braking power—never a good trade-off.
If the pads still have some life left in them, check for uneven wear. Sometimes one side of the pad wears down faster than the other, which can cause the pad to contact the rotor at an angle, creating noise. If you spot this, it might be a sign of misalignment that you can correct before putting the pads back in.
Finally, take note of any dirt, oil, or debris on the pads. Even a small amount of contamination can lead to a noisy brake. If you find any, you’ll want to clean the pads thoroughly before reinstallation.
The Sanding Technique: Smooth Out the Bicycle Disc Brakes Noise
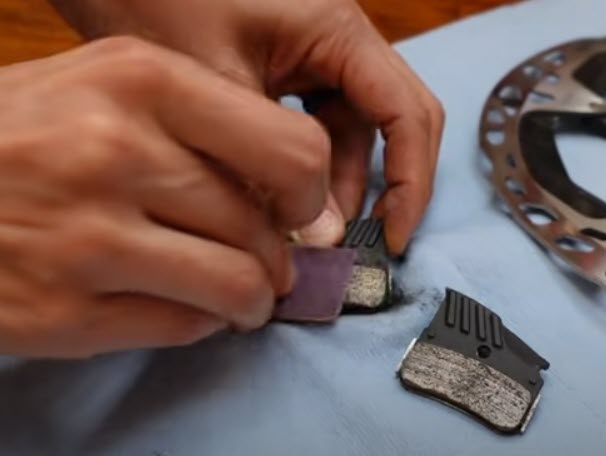
If your brake pads are still in decent shape but making noise, there’s a simple trick that can often work wonders: sanding. Lightly sanding the surface of the pads can remove glaze buildup—a common cause of squeaky brakes.
To do this, grab a piece of fine-grit sandpaper, preferably around 120 to 150 grit. Place the sandpaper on a flat surface and gently rub the brake pad surface against it in a circular motion. The goal here isn’t to remove a lot of material, just to roughen up the surface slightly and remove any glossy spots. This process helps the pads grip the rotor more effectively, which can dramatically reduce noise.
After sanding, be sure to clean the pads with isopropyl alcohol to remove any dust or debris from the sanding process. Let them dry completely before reinstalling them. This little bit of effort can give your pads a fresh start, improving both performance and quietness.
Advanced DIY Solutions for Persistent Squeaks
Applying Disc Brake Quiet Paste
If you’ve tried the basics and those squeaks persist, it might be time to bring out the big guns. Enter disc brake quiet paste, a specialized product designed to silence stubborn noise by dampening vibrations between the brake pads and calipers. This paste can be a game-changer, especially for cyclists who’ve tried everything else without success.
Disc brake quiet paste is a high-temperature, viscous compound that’s applied to the back of the brake pads—specifically where they contact the caliper pistons. The paste acts as a cushion, absorbing vibrations that can lead to noise. Think of it as a silencer for your braking system.
To apply the paste, first, remove the brake pads and clean the backs thoroughly to ensure the paste adheres properly. Then, apply a thin, even layer of the paste to the back of each pad—not on the braking surface itself.
A little goes a long way, so don’t overdo it. Once the paste is applied, reinsert the pads into the calipers and reassemble your brake system.
Allow the paste to cure according to the manufacturer’s instructions before taking your bike out for a spin. You should notice an immediate difference—your brakes will be quieter, with a more refined, controlled feel. This is a great solution for riders who frequently encounter squeaky brakes, especially in varied weather conditions or after long rides.
Upgrading to Better Brake Pads
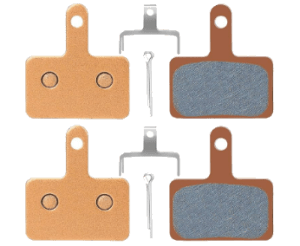
Sometimes, the best way to silence persistent squeaks is to upgrade your brake pads altogether. While standard pads are often sufficient for most riders, those who demand top-tier performance or ride in challenging conditions might benefit from higher-quality pads.
High-performance brake pads are designed with advanced materials that offer superior heat resistance, better modulation, and—most importantly—quiet operation. Semi-metallic pads, for example, provide a good balance of durability and performance, making them a popular choice for many cyclists.
They’re less prone to glazing and often quieter than organic pads, especially under heavy braking.
Sintered pads, on the other hand, are made from metal particles fused together under high heat and pressure. They’re incredibly durable and perform well in wet and muddy conditions, but they can be noisier than other types.
If brake noise reduction is your primary concern, organic or resin pads might be your best bet. These pads are made from softer materials, which tend to be quieter but wear out faster.
Upgrading your brake pads can be a straightforward way to improve both performance and quietness. If you find that your current pads just aren’t cutting it, investing in a higher-quality set can make all the difference.
You’ll enjoy a more responsive braking experience with the added bonus of a quieter ride. Plus, it’s a relatively inexpensive upgrade that can extend the life of your braking system overall.
Preventative Measures for Future Quiet Rides
Avoiding Contamination: What to Watch Out For
Now that your brakes are squeak-free, thanks to the bicycle disc brake maintenance steps we’ve already covered, the goal is to keep them that way. The number one enemy of silent braking is contamination—oil, grease, and even dust can quickly turn your smooth ride into a noisy ordeal.
But with a few simple precautions, you can keep those contaminants at bay and enjoy quiet, confident braking for miles to come.
First and foremost, be mindful of where and how you lubricate your bike. While chain lube is essential for smooth pedaling, it can be disastrous for your brakes if it ends up on the rotors or pads.
When applying lube to your chain, take extra care to wipe away any excess and shield your brakes from overspray. A quick tip: cover your brake calipers with a clean cloth while lubing the chain to prevent any accidental splashes.
Next, pay attention to your environment. If you ride in areas with a lot of dust, dirt, or even road salt, your brakes are more likely to get contaminated. After a particularly dirty ride, take a few minutes to clean your rotors with isopropyl alcohol and a clean cloth. This quick routine can prevent buildup that leads to noise and diminished bicycle braking efficiency.
Another common source of contamination is handling your bike. It’s easy to accidentally touch the rotors with oily fingers when lifting or moving your bike, especially after working on it.
The oils from your skin can transfer to the rotor and brake pads, causing squeaks. Always try to handle your bike by the frame or non-braking components, and if you do touch the rotors, give them a quick wipe down before your next ride.
When washing your bike, use a gentle spray or a bucket of soapy water rather than a high-pressure hose. High-pressure water can force contaminants into places they shouldn’t be, like your brake calipers. After washing, dry the bike thoroughly and consider giving the rotors a final wipe with isopropyl alcohol to remove any lingering moisture or soap residue.
Lastly, be cautious about where you store your bike. Garages or sheds where you also store chemicals like solvents, paint, or motor oil can expose your bike to airborne contaminants.
If possible, store your bike in a clean, dry place away from these substances. A cover can also help protect it from dust and debris when not in use.
Troubleshooting Common Problems
What If the Squeak Persists?
So, you’ve followed all the steps—cleaned the rotors, aligned the calipers, checked the pads, and even applied brake quiet paste. Yet, that stubborn squeak refuses to leave. Frustrating, right? Don’t worry, you’re not out of options just yet. There are a few additional steps you can take if your brakes are still noisy after trying the basic fixes.
First, consider the possibility of pad contamination that’s more stubborn than usual. If you suspect the pads are deeply contaminated, you might want to try a more aggressive cleaning method.
Some cyclists find success by lightly baking their brake pads in an oven to burn off any oil or contaminants—though this approach requires caution. Another option is to replace the pads entirely, especially if they’re old or worn. Fresh pads can often make a world of difference.
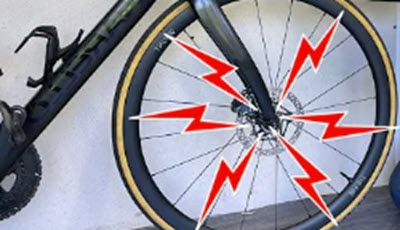
If cleaning doesn’t do the trick, it’s worth rechecking your rotor. Even a slight warp in the rotor can cause noise that’s difficult to eliminate. Spin the wheel and watch the rotor closely as it passes through the caliper.
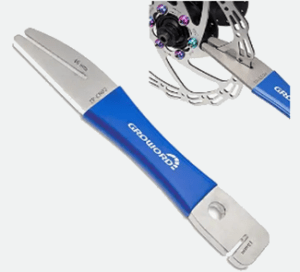
If you notice any wobble, you might need to true the rotor or replace it. A bent rotor can create intermittent contact with the pads, leading to that persistent squeak.
Don’t overlook the possibility of loose spokes or a wobbly wheel. These issues can cause vibration and noise that might sound like it’s coming from the brakes but originates elsewhere. Tightening the spokes or truing the wheel can eliminate this source of noise.
Finally, consider whether your brake pads and rotors are compatible. Not all pads work equally well with every rotor. Mixing organic pads with a rotor designed for metallic pads, for example, can lead to suboptimal performance and noise. If you suspect a mismatch, consult the manufacturer’s recommendations or experiment with different pads.
When to Seek Professional Help
Sometimes, despite your best efforts, the squeak just won’t quit. If you’ve tried everything and the noise persists, it might be time to call in the pros. Knowing when to seek professional help can save you a lot of frustration and ensure your bike is safe and reliable.
A professional bike mechanic has the tools and expertise to diagnose and fix issues that might be beyond the scope of DIY repairs. For instance, if your brake calipers need a complete overhaul or your rotor is warped beyond repair, a mechanic can handle these tasks with precision.
They can also assess whether other components of your braking system might be contributing to the noise, such as the hub bearings or the fork alignment.
Additionally, if you’re not comfortable making more complex adjustments—like truing a rotor or adjusting hydraulic brakes—it’s best to leave it to someone with experience. Attempting these repairs without the proper knowledge or tools can lead to further damage, and potentially compromise your safety on the road.
Seeking professional help doesn’t mean you’ve failed as a DIY cyclist—it’s simply recognizing when an expert’s touch is needed. A quick visit to the bike shop can often resolve persistent issues and give you peace of mind, knowing your brakes are in top condition.
Myths and Misconceptions About Squeaky Disc Brakes
Debunking Popular Myths
When it comes to squeaky bicycle disc brakes, there’s no shortage of myths and misconceptions floating around. These myths can lead you down the wrong path, causing more frustration than solutions. Let’s set the record straight by debunking some of the most common myths about what causes squeaky brakes and how to fix them.
Myth #1: Squeaky Brakes Mean They’re Worn Out.
One of the biggest misconceptions is that a squeak always means your brake pads are shot and need replacing. While it’s true that worn-out pads can cause noise, squeaks often stem from other issues like contamination, misalignment, or even weather conditions.
Before rushing to buy new pads, consider cleaning your current ones, checking for alignment, or simply giving them time to bed in properly. Often, a squeak is more about needing a bit of maintenance than a full-on replacement.
Myth #2: Only Cheap Brake Pads Squeak.
Another myth is that squeaky brakes are a sign of low-quality pads. The reality is, even the most expensive, high-end pads can squeak under the right (or wrong) conditions.
Factors like brake pad material, rotor compatibility, and even the installation process can all influence whether your brakes make noise. It’s not about the price tag; it’s about how well the components work together and how they’re maintained.
Myth #3: The Louder the Squeak, the More Effective the Brake.
Some riders believe that a loud squeak indicates powerful braking. This couldn’t be further from the truth. A squeak is usually a sign that something is wrong, whether it’s contamination, glazing, or improper alignment. While a squeak might catch attention, it doesn’t equate to better performance—in fact, it could mean your braking power is compromised.
Myth #4: Wet Conditions Always Cause Squeaky Brakes.
Yes, rain and moisture can contribute to brake noise, but they aren’t guaranteed to make your brakes squeak. If your brakes are properly maintained, with clean rotors and pads, they should perform quietly even in wet conditions. It’s all about preparation—keeping your braking system clean and in good condition can help minimize noise, regardless of the weather.
Finally, some cyclists simply accept squeaky brakes as a fact of life. They assume that all disc brakes will make noise at some point, and there’s nothing to be done about it.
This is far from the truth. With proper care—cleaning, alignment, and using compatible components—you can enjoy quiet, effective braking. Squeaky brakes are not an inevitability; they’re a sign that your bike needs a bit of attention.
Conclusion
Enjoying a Quiet Ride
There’s nothing quite like the peace of a quiet, smooth ride. The wind in your face, the rhythmic hum of your tires on the road, and—most importantly—the blissful silence when you hit the brakes. Maintaining your bicycle disc brakes isn’t just about eliminating that annoying squeak; it’s about ensuring that every ride is as enjoyable and safe as possible.
Proper bike care and maintenance keeps your braking system in top shape, delivering consistent performance when you need it most. Whether you’re descending a steep hill or navigating through city traffic, knowing that your brakes will respond smoothly and quietly gives you confidence. No distractions, no wincing at that high-pitched squeal—just the sheer joy of cycling.
The benefits of a squeak-free ride go beyond comfort. Quiet brakes mean that your components are clean, aligned, and functioning optimally. This reduces wear and tear, prolongs the life of your pads and rotors, and saves you money in the long run.
Plus, there’s the added bonus of not disturbing the peace as you glide through your favorite routes.
Taking the time to care for your brakes is an investment in your ride’s quality and your overall cycling experience. A little bit of maintenance goes a long way in preventing issues before they arise, ensuring that your bike is always ready for the next adventure.
If you enjoyed learning about this week’s featured bicycle, don’t miss out on more classic bike goodness! Visit our website at classicjapanesebicycles.com for an extensive collection of timeless Japanese bikes and their unique stories. Plus, check out our YouTube channel, Bicycle Restoration Man, for detailed restoration videos and showcases of our finished projects. Subscribe and join our community of bike enthusiasts!
 |

|
We earn from qualified Amazon purchases with NO cost to you. ANY item that you need or were going to purchased anyway through any of our links, helps support this site. Thank you for your support!


