Contents
- 1 Optimize Bike Fitting for Comfort and Performance!
Optimize Bike Fitting for Comfort and Performance!
A proper bike fitting should make cycling a symphony of motion, not a battle against discomfort. Yet, many cyclists endure unnecessary pain and inefficiency due to poor bike fit. Knee pain, saddle sores, and numb hands can transform a joyous ride into a grueling ordeal. A perfectly tuned bike fit can elevate your cycling performance and comfort to new heights.
This isn’t just for elite riders—every cyclist deserves to ride in harmony with their machine. In this post, we’ll unlock the secrets to achieving the perfect bike fit, ensuring every pedal stroke is powerful and pain-free. Prepare to revolutionize your cycling experience and ride like never before.
Understanding Bike Fit
What is Bike Fitting?
Bike fitting is the process of adjusting a bicycle to match a rider’s physical attributes and riding style. It’s a science and an art, requiring precision and a keen understanding of biomechanics in cycling. Proper bike fitting involves aligning the bike’s components—such as the saddle, handlebars, and pedals—to optimize cycling comfort, efficiency, and power output.
Why is Proper Bike Fit Crucial?
A well-fitted bike is crucial for several reasons. Firstly, it minimizes discomfort. An ill-fitting bike can cause a myriad of issues, from saddle sores to chronic knee pain cycling. Secondly, it enhances performance.
When your bike is perfectly adjusted, you can pedal more efficiently, conserving energy and maximizing speed. Finally, proper bike fitting reduces the risk of injury. By aligning your body correctly on the bike, you avoid undue strain on your muscles and joints.
The Benefits of a Good Bike Fit
Statistics and expert insights highlight the profound impact of proper bike fitting. According to a study published in the Journal of Sports Sciences, cyclists with optimal bike fitting showed a 6% increase in power output and a 12% reduction in perceived exertion.
Dr. Andy Pruitt, founder of the Boulder Center for Sports Medicine, asserts, “A proper bike fit is not a luxury; it’s a necessity for anyone serious about cycling.” This investment in bike fitting pays dividends in cycling comfort, speed, and overall enjoyment of the sport.
Identifying Common Bike Fit Issues
Saddle Sores
To relieve saddle sores, ensure your bike fitting includes the correct saddle height adjustment and angle. A saddle that’s too high or tilted can cause excessive pressure and friction. Adjust the saddle height so your leg is slightly bent at the bottom of the pedal stroke. Experiment with the angle to find a position that distributes your weight evenly.
Knee Pain
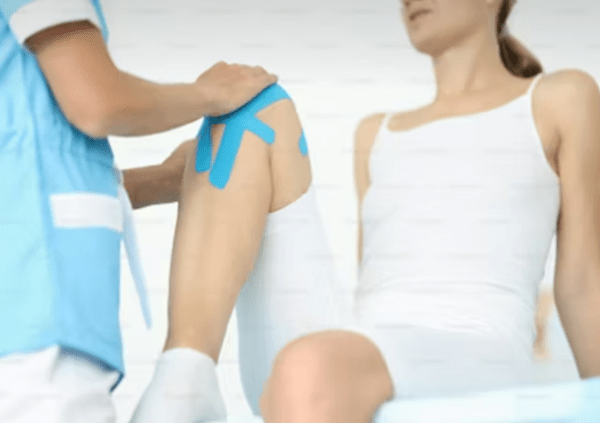
Relieving knee pain involves adjusting your bike fitting to include proper saddle height and cleat positioning. If your knees hurt in the front, try raising your saddle slightly. If the pain is in the back, lower it a bit. Ensure your cleats are aligned correctly to prevent twisting your knees. A professional bike fitting can help fine-tune these adjustments.
Lower Back Pain
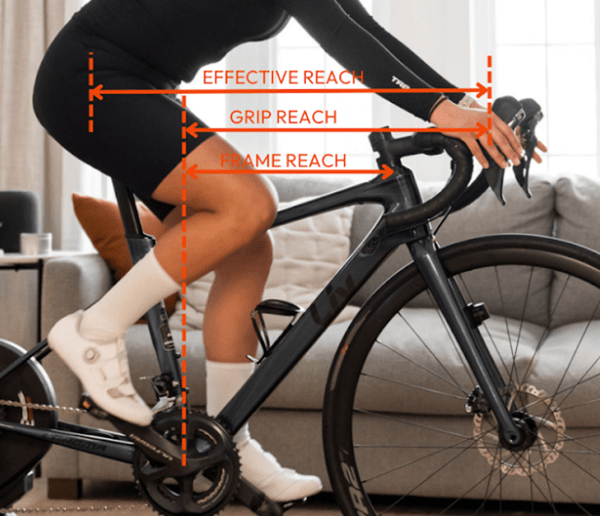
To address lower back pain, check your bike fitting, particularly the handlebar position. Raise the handlebars if they’re too low, bringing them closer to your saddle height. Ensure your reach to the handlebars isn’t too long, which can cause you to overstretch. A more upright position can reduce strain on your lower back.
Numbness in Hands or Feet
For numbness in hands, adjust your bike fitting to include proper handlebar height to distribute weight more evenly between your saddle and handlebars. Padded gloves and handlebar tape can also help. For foot numbness cycling, check your cleat positioning and ensure your shoes aren’t too tight. Adjust your saddle height to prevent excessive pressure on your feet.
Neck and Shoulder Pain
To relieve neck and shoulder pain, raise your handlebars as part of your bike fitting to reduce the strain from reaching too far or being too low. Adjust your handlebar reach to ensure a natural, relaxed position for your arms and shoulders. Regularly stretching and strengthening your neck and shoulder muscles can also help alleviate pain.
Essential Measurements for a Proper Fit
Achieving an optimal bike fitting requires precise measurements. These key dimensions ensure that your bike aligns perfectly with your body, enhancing comfort and performance.
Inseam Length
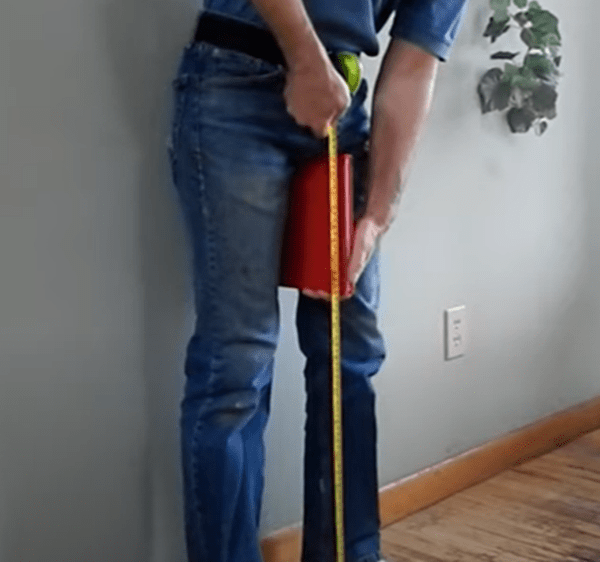
Inseam length is fundamental to a proper bike fitting. To measure your inseam, stand barefoot against a wall with a book held snugly between your legs, mimicking the saddle. Measure from the floor to the top of the book. This measurement helps determine your ideal saddle height, ensuring your legs extend comfortably and efficiently during each pedal stroke.
Torso Length
Your torso length affects your reach to the handlebars, a crucial aspect of bike fitting. To measure, stand straight and measure from your crotch to the notch at the base of your throat. A correct torso length measurement helps adjust your bike’s frame size and handlebar reach, preventing overstretching and ensuring a relaxed riding posture.
Arm Length
Arm length influences how comfortably you can reach the handlebars and control your bike. Measure from the top of your shoulder to the tip of your middle finger. This measurement, combined with torso length, guides the adjustment of your handlebar position, ensuring that you maintain control without straining your shoulders and neck.
Flexibility
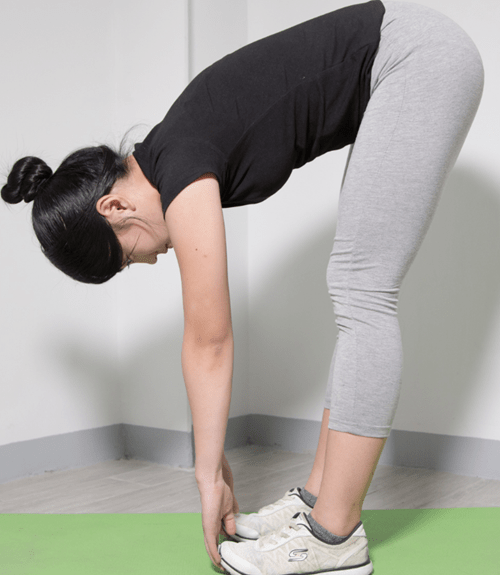
Flexibility plays a significant role in bike fitting, affecting your comfort and efficiency. To assess flexibility, perform a simple forward bend test. Stand with feet together and bend forward, trying to touch your toes. Note how far you can reach without discomfort. Higher flexibility allows for a more aggressive, aerodynamic position, while lower flexibility necessitates a more upright, comfortable posture.
Foot Size
Foot size is crucial for proper cleat positioning and pedal efficiency. Measure your foot length by placing a sheet of paper against a wall, standing on it with your heel against the wall, and marking the longest part of your foot. Use this measurement to ensure your cycling shoes fit well and your cleats are positioned correctly, maximizing power transfer and minimizing discomfort.
Adjusting Your Bike for Optimal Fit
Achieving an optimal bike fitting requires precise adjustments to various components of your bike. Here’s a step-by-step guide to ensure every part is perfectly aligned with your body, enhancing both comfort and performance.
Saddle Height and Position
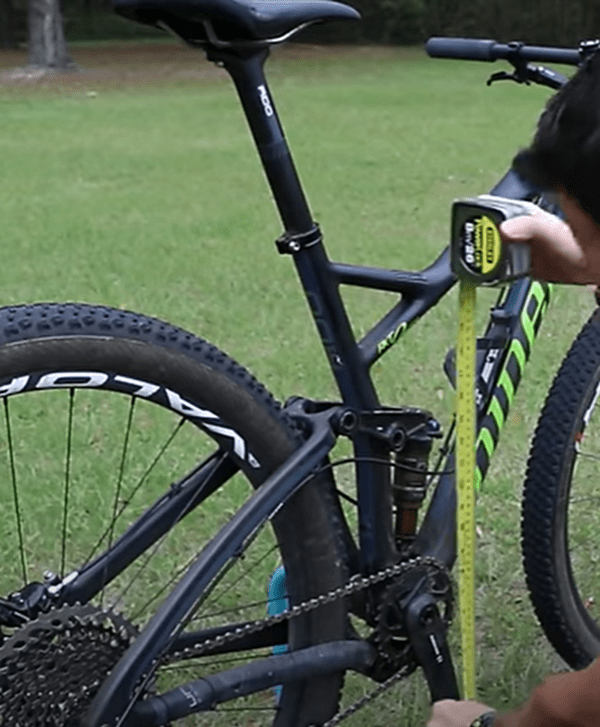
Start with the saddle height, a critical aspect of bike fitting. To set it correctly, sit on your bike with one pedal at its lowest point. Your leg should be almost fully extended, with a slight bend at the knee.
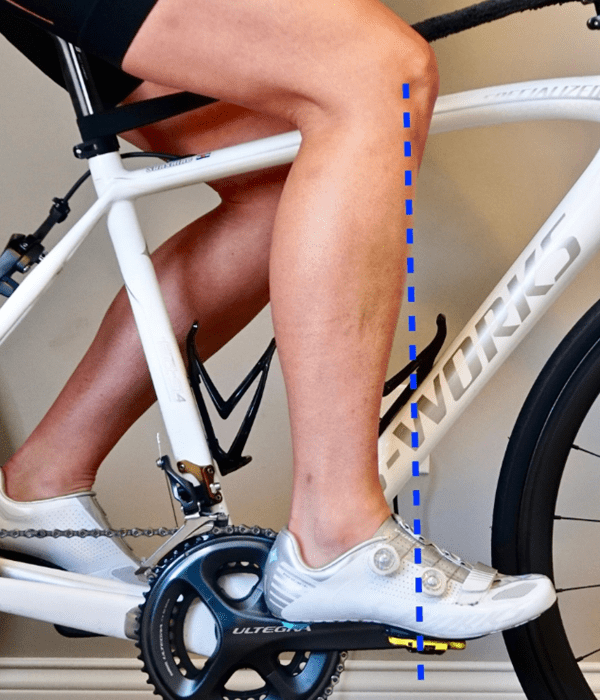
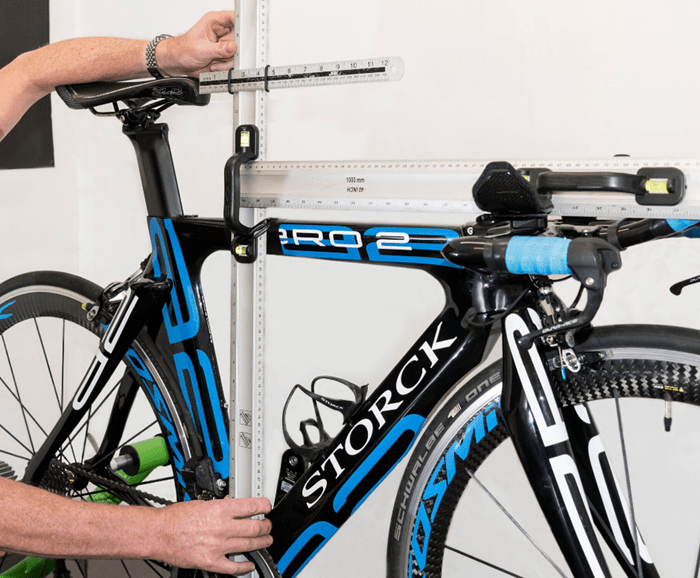
Use a tape measure to ensure the saddle is at the correct height. Next, adjust the saddle position. Move it forward or backward until your knee is directly over the pedal axle (image above) when the pedals are horizontal. This positioning prevents knee strain and maximizes power output.
Handlebar Height and Reach
Handlebar adjustments are vital for comfort and control. To set the handlebar height, begin with it level with the saddle. For a more relaxed position, raise the handlebars slightly. Lower them for a more aerodynamic stance. Adjust the reach by sliding the handlebars forward or backward.
A proper reach ensures you’re not overstretching, which can lead to neck and shoulder pain. When you grip the handlebars, your arms should have a slight bend, allowing for a comfortable and responsive ride.
Cleat Position on Cycling Shoes
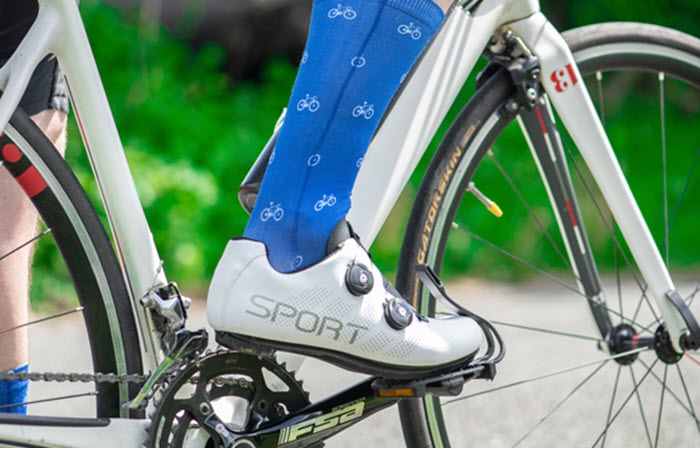
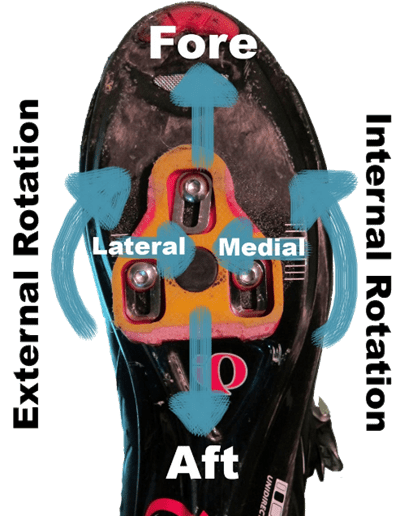
Cleat positioning is crucial for efficient pedaling and preventing foot discomfort. Begin by placing the cleat under the ball of your foot, where the big toe joint is located. Adjust the angle so your feet sit naturally on the pedals. Stand over your bike, clip in, and ensure your knees track straight during pedaling.
Fine-tune the position to avoid any twisting motion, which can cause knee pain. Or, have someone film as you walk. Notice if your toes our outward or inward. Setting your pedals as close to this position as possible or increasing pedal float should alleviate knee pain. Proper cleat alignment is essential for a seamless power transfer from your legs to the pedals.
Frame Size Selection
Selecting the right bike frame size is the foundation of a good bike fitting. Stand over the bike frame with your feet flat on the ground. There should be a 1-2 inch gap between the top tube and your groin for a road bike, and a 2-4 inch gap for a mountain bike.
Measure the distance from the top of the seat tube to the middle of the bottom bracket. This measurement helps determine if the frame size is suitable for your body proportions. A correctly sized frame ensures all other adjustments will be more effective, providing a comfortable and efficient ride.
Professional Bike Fitting Services
The Benefits of Professional Bike Fitting
Investing in a professional bike fitting can elevate your cycling experience to new heights. Expert bike fitters have a keen eye for detail and an in-depth understanding of biomechanics in cycling, ensuring that every adjustment is tailored to your unique body and riding style.
This personalized approach can dramatically reduce discomfort, prevent cycling injuries, and enhance your overall performance. By optimizing your bike fit, you’ll ride longer, faster, and more comfortably.
What to Expect During a Professional Fitting Session
A professional bike fitting session is thorough and comprehensive. It typically begins with a detailed interview about your cycling history, goals, and any discomfort you’ve experienced. The fitter will then conduct a physical assessment, measuring your flexibility, strength, and anatomical alignment. Expect precise measurements of your inseam, torso length, arm length, and foot size, among others.
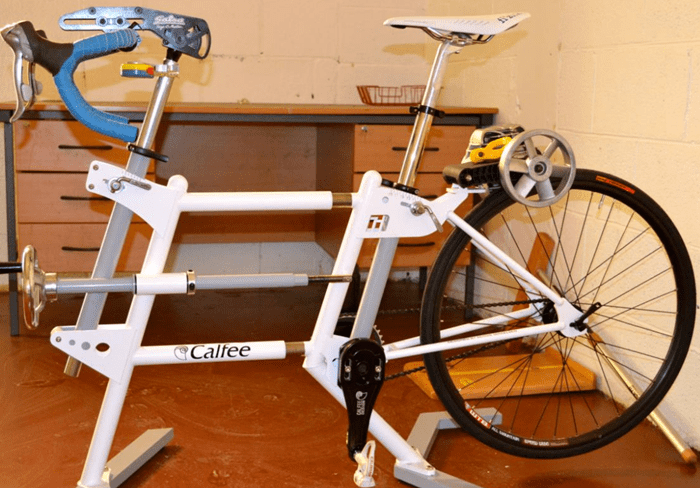
Using advanced tools and software, the fitter will analyze your riding position and make necessary adjustments to your saddle height, handlebar position, and cleat alignment. Throughout the session, you’ll receive expert advice on cycling posture and technique, ensuring that every aspect of your fit is optimized for comfort and performance. They should put you on your bike and watch as you’re pedaling. Most professionals will look for how your whole body moves as you ride.
Tips on Choosing a Reputable Bike Fitting Service
Selecting the right bike fitting service is crucial for a successful fit. Start by seeking recommendations from fellow cyclists or your local bike shop. Look for fitters with professional certifications, such as those from the International Bike Fitting Institute (IBFI) or the Bike Fit certification. Read reviews and testimonials to gauge the fitter’s expertise and customer satisfaction.
When contacting a potential fitter, ask about their experience, the fitting process, and the tools they use. A reputable fitter will be transparent, knowledgeable, and eager to address your concerns. Investing in a professional bike fitting service can transform your cycling experience, making each ride a joyous, pain-free adventure.
DIY Bike Fitting Tips
Not everyone has access to a professional bike fitter, but you can still achieve a good fit on your own. Here are some practical bike fitting tips to help you adjust your bike for optimal comfort and performance.
Using Online Bike Fitting Calculators
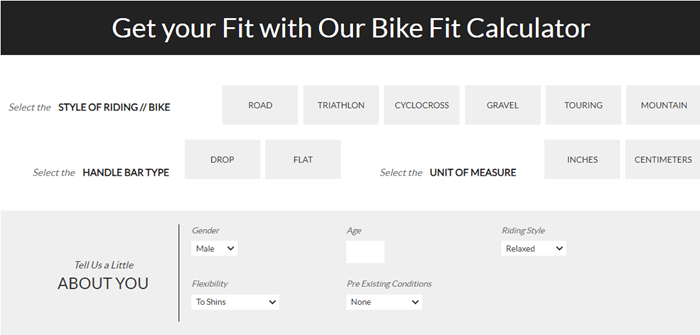
Online bike fitting calculators are a great starting point for your adjustments. These tools use your body measurements to provide recommendations for saddle height, handlebar position, and bike frame size. To use these calculators, you’ll need to input accurate measurements of your inseam, torso length, arm length, and foot size. While not as precise as a professional fitting, these calculators can give you a solid baseline for your bike adjustments.
Trial and Error Method
The trial and error method requires patience but can be highly effective. Start by adjusting one component at a time. For instance, if you’re experiencing knee pain, tweak your saddle height in small increments until you find relief. Ride for a few days to test each adjustment.
Pay attention to how your body feels and make further tweaks as necessary. This method allows you to fine-tune your bike fitting based on real-world riding experience, ensuring a comfortable and efficient cycling setup.
Seeking Advice from Experienced Cyclists or Local Bike Shops
Don’t hesitate to seek advice from experienced cyclists or your local bike shop. Veteran riders often have valuable insights into bike fitting and can share tips that worked for them. Local bike shops typically offer basic fitting services and can help you with more challenging adjustments. Building a network of knowledgeable cyclists can provide ongoing support and advice as you refine your bike fit.
Maintaining Your Bike Fit
Achieving the perfect bike fitting is only the beginning. Regularly checking and adjusting your bike fit is crucial to maintaining comfort and performance. Over time, your body and riding style can change, and your bike fit should adapt accordingly.
The Importance of Regular Bike Fit Checks
Regular bike fit checks ensure that your bike continues to match your body’s needs. Small changes in your fitness level, flexibility, or even weight can impact your comfort and efficiency on the bike. By making periodic adjustments, you can prevent discomfort and avoid potential injuries. Think of bike fitting as an ongoing process rather than a one-time setup.
Checklist for Routine Bike Fit Maintenance
To keep your bike fitting optimized, follow this simple bike fit checklist:
Saddle Height:
Ensure your saddle is at the right height by checking that your leg is slightly bent at the bottom of the pedal stroke.
Saddle Position:
Verify that your knee is directly over the pedal axle when the pedals are horizontal.
Handlebar Position:
Check handlebar height and reach to ensure a comfortable, strain-free riding posture.
Cleat Alignment:
Regularly inspect cleat positioning to ensure proper foot alignment and prevent knee pain.
Frame Size:
Make sure your bike frame size still feels right for your body dimensions and riding style.
Adapting to Changes in Fitness, Flexibility, or Weight
As you ride more, your fitness and flexibility levels will likely improve. Increased cycling flexibility might allow you to lower your handlebars for a more aerodynamic position. Conversely, if you’ve gained or lost weight, your center of gravity may shift, necessitating adjustments to your saddle or handlebars. Regularly reassessing your bike fit in response to these changes ensures that your cycling setup continues to support your cycling goals.
By staying attentive to your bike fitting and making routine adjustments, you can maintain a comfortable and efficient riding experience. Ready to keep your ride smooth and pain-free? Let’s make sure your bike fit evolves with you, ensuring every ride is as enjoyable as the first.
We invite you to share your bike fitting experiences in the contact page on this site. Have you made adjustments that significantly improved your ride? Do you have questions about achieving the perfect fit? Your insights and inquiries can help create a supportive community of cyclists all striving for the same goal—comfort and speed on every ride.
Lastly, explore our additional resources and related blog posts for more information on optimizing your cycling performance. Here are a few to get you started:
7 Points Of High Intensity Interval Training
Cycling Diet For Top Performance
If you’re looking to fine-tune your fit, consider investing in bike fitting tools or scheduling a bike fitting session with a local bike fitting service. Their bike fit expertise can make a significant difference in your riding posture and overall cycling experience.
Happy cycling!
 |
 |
We earn from qualified Amazon purchases with NO cost to you. ANY item that you need or were going to purchased anyway through any of our links, helps support this site. Thank you for your support!


