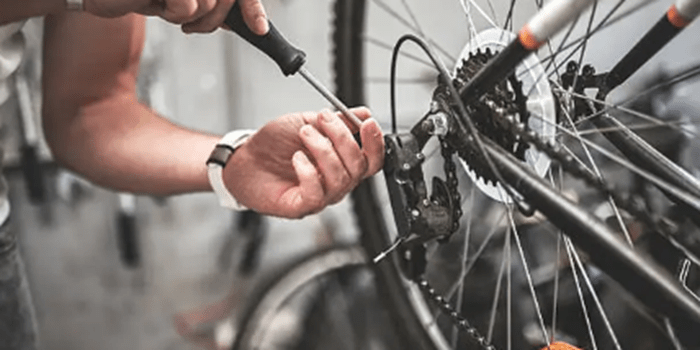
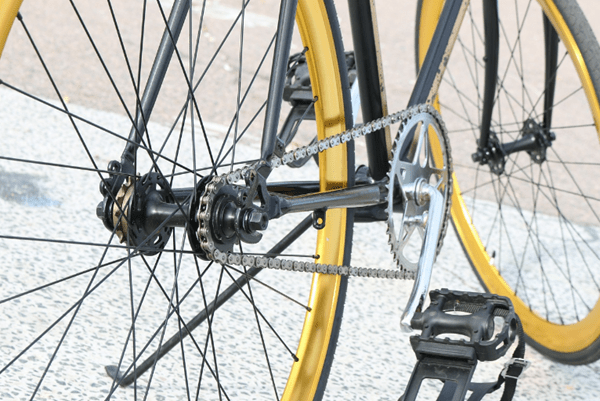
Bicycle Maintenance: For Problem Free Riding Regular bicycle maintenance is essential for a smooth and trouble-free riding experience. By taking proper care of your bike, you can avoid unnecessary breakdowns and ensure its longevity. Make sure to regularly clean and lubricate the chain, check tire pressure, and tighten any loose bolts. By following these simple maintenance practices, you can enjoy problem-free rides and extend the life of your bicycle.
Contents
- 1 Bicycle Maintenance: For Problem Free Riding
- 1.1 Essential Tools for Bicycle Maintenance
- 1.2 Inspecting Your Bike: The Pre-Ride Check
- 1.3 Cleaning Your Bicycle: Shine and Protect
- 1.4 Lubrication: The Key to a Smooth Ride
- 1.5 Brakes: Ensuring Reliable Stopping Power
- 1.6 Tires and Wheels: Keeping You Rolling
- 1.7 Drivetrain: Keeping the Gears Running Smoothly
- 1.8 Electronic Shifting: High-Tech Maintenance Tips
- 1.9 Frame and Fork: Inspecting for Damage
- 1.10 Saddle and Handlebars: Comfort and Control
- 1.11 Recap of Key Bicycle Maintenance Points
Bicycle Maintenance: For Problem Free Riding
Why Regular Maintenance Matters
Imagine gliding down a scenic trail, the wind whipping through your hair, the road stretching out endlessly before you. Suddenly, a jarring noise interrupts your bliss—your bike is protesting. Regular bicycle maintenance isn’t just a chore; it’s the key to keeping that perfect ride alive. Neglecting your bicycle can lead to a plethora of issues, from minor annoyances to serious safety hazards.
When you maintain your bike regularly, you’re not just avoiding breakdowns. You’re extending the life of your components, ensuring your rides are smooth and enjoyable. Think of it as a small investment of time that pays off in reliability and performance. Regular check-ups can prevent larger, costlier repairs down the line, keeping your bike—and you—safe on every adventure.
Benefits of a Well-Maintained Bike
A well-maintained bike isn’t just about functionality—it’s about the joy of riding. When your bike is in top shape, every ride feels effortless. Hills seem less daunting, speeds more exhilarating, and handling more precise. This isn’t just about avoiding the inconvenience of a flat tire or a dropped chain. It’s about transforming your cycling experience with proper bicycle maintenance.
Smooth gear shifts, responsive braking, and a silent, efficient drivetrain make every ride a pleasure. Plus, a clean, well-lubricated bike runs more efficiently, saving you energy and allowing you to ride longer and faster. It’s not just about the bike; it’s about your connection to it. A well-maintained bike is a trusted companion, ready to take you wherever you want to go without hesitation.
In the following sections, we’ll dive into the nitty-gritty of bicycle maintenance, from essential tools to advanced care techniques. Whether you’re a casual rider or a seasoned cyclist, these bike maintenance tips will help you keep your ride in prime condition, ensuring every journey is as enjoyable as the last.
Essential Tools for Bicycle Maintenance
Must-Have Tools for Every Cyclist
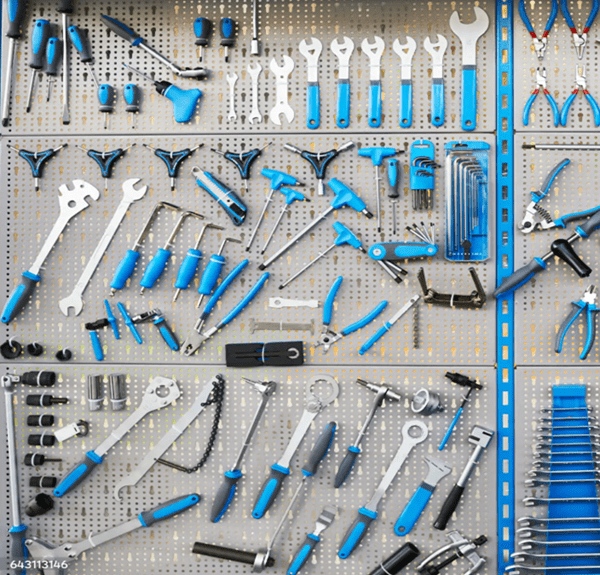
Starting with the basics, having the right bike tools is crucial for any cyclist who wants to keep their bike in top shape. A well-stocked toolbox can make the difference between a quick bike repair and a frustrating day off the bike.
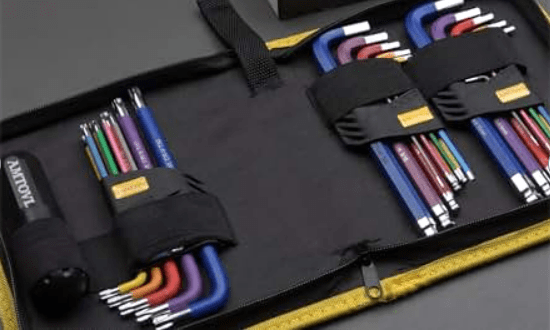
First, every cyclist should have a set of Allen keys. These versatile tools are essential for adjusting almost every component on your bike, from the seat post to the brakes. Next, a good tire pump with a pressure gauge is indispensable.
Keeping your tires at the correct pressure not only ensures a smooth ride but also helps prevent flats. A multi-tool, which typically includes a variety of Allen keys, screwdrivers, and sometimes even a chain tool, is another must-have. It’s compact, portable, and can handle most minor adjustments and repairs on the go, essential for proper bicycle maintenance.
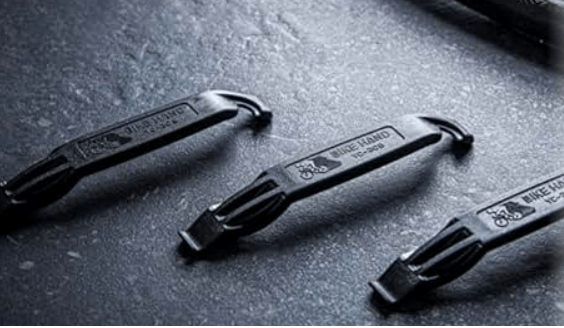
A tire lever set is essential for dealing with flats. These simple plastic levers make removing a tire from the rim much easier, especially when you’re on the side of the road. Coupled with a spare tube and a patch kit, you’re prepared for any puncture emergencies. Chain lubricant is another basic yet vital item.
Keeping your chain well-lubricated reduces wear and tear on your drivetrain and ensures smooth, quiet pedaling.
Specialized Tools for Advanced Care
For those who want to take their bike maintenance game to the next level, investing in some specialized tools can be a game-changer. These tools can make more complex repairs and adjustments easier and more precise.
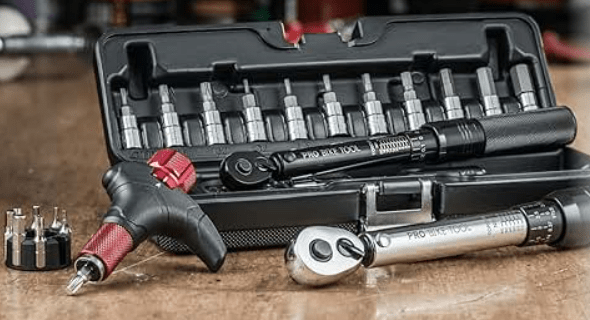
A torque wrench is a must for modern bikes, especially those with carbon components. Over-tightening bolts can cause expensive damage, while under-tightening can lead to components slipping or failing. A torque wrench ensures that every bolt is tightened to the manufacturer’s specifications.
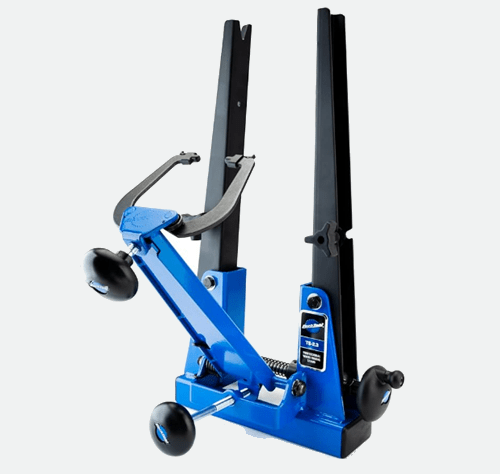
A truing stand is invaluable for keeping your wheels in perfect shape. This tool helps you adjust the spoke tension to keep your wheels true, which is crucial for safe and efficient riding.
While you can make minor adjustments with your bike upside down, a truing stand makes the process much more accurate and less time-consuming.
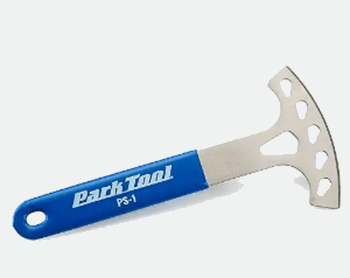
For those with mechanical disc brakes or hydraulic disc brakes, a disc brake pad spreader is a handy tool. This tool helps push the brake pads apart to make installing and removing wheels easier, and it’s essential for maintaining proper brake function.
Additionally, if you have a bike with electronic shifting, a diagnostic tool for the electronic drivetrain can help you troubleshoot any issues and keep the system running smoothly.
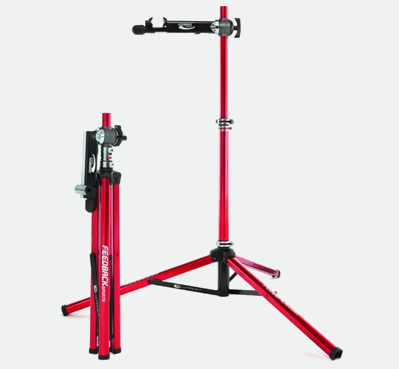
Finally, a work stand is a fantastic investment for anyone serious about bicycle maintenance. It holds your bike securely in place, making it easier to work on and allowing you to access all parts of the bike without bending over or working on the floor. This can make a world of difference, especially for more involved repairs and adjustments.
Inspecting Your Bike: The Pre-Ride Check
Quick Pre-Ride Safety Check
Before you hit the road or trail, a quick pre-ride safety check is essential. This simple routine can save you from potential mishaps and ensure a smooth, enjoyable ride. Start with the ABCs: Air, Brakes, and Chain.
First, check your tires. Ensure they are inflated to the recommended tire pressure, which is usually printed on the sidewall. Squeeze them to confirm they’re firm, and give each tire a quick spin to check for any embedded debris or significant wear.
Next, test your brakes. Squeeze the brake levers to ensure they engage smoothly and firmly. The brake pads should make contact with the rim or disc evenly and without excessive noise.
Make sure the cables are intact and not frayed. A quick roll of the bike and a squeeze of the brakes will tell you if they’re working correctly.
Now, look at your chain and drivetrain. The chain should be clean and well-lubricated, not rusty or dry. Run through your gears to make sure they shift smoothly. Lift the rear wheel off the ground and pedal to check for any skipping or hesitation.
Lastly, as part of your bicycle maintenance, give your bike a once-over. Check for any loose bolts or parts, especially on the handlebars, saddle, and wheels. A quick shake of the bike can help you identify any rattling or loose components.
Identifying Potential Issues Before They Happen
Regular pre-ride checks can help you spot potential problems before they escalate. Pay attention to how your bike feels and sounds; unusual noises or changes in performance can be early indicators of issues.
Check the tire sidewalls For cracks or bulges, which can signal weakening rubber, bicycle maintenance is crucial. Inspect the brake pads regularly; if they’re worn thin, it’s time to replace them.
Listen to your bike—squeaks, creaks, and clunks can all be signs that something needs attention. For instance, a creaking sound when you pedal might indicate a loose bottom bracket or crank arm.
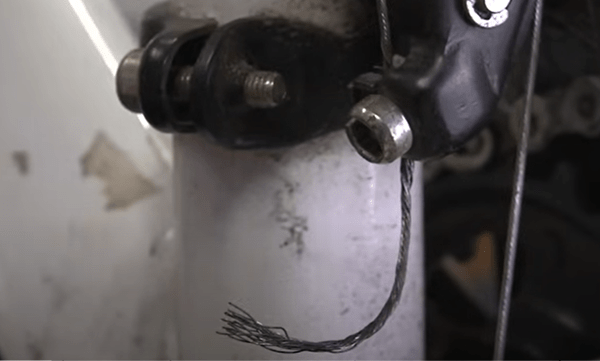
Look at the cables for signs of wear or fraying. Over time, cables can stretch or corrode, impacting your shifting and braking performance. If you notice any damage, replace the cables promptly.
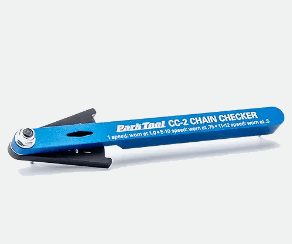
Examine the chain for wear using a chain checker tool. A stretched chain can wear out your cassette and chainrings prematurely. Replacing a worn chain in time can save you from more costly repairs.
Regularly inspect your frame and fork for any cracks, dents, or signs of fatigue, especially if you ride hard or on rough terrain. Pay special attention to welds and joints, which are common stress points.
Cleaning Your Bicycle: Shine and Protect
Basic Cleaning Supplies and Techniques
Keeping your bicycle clean not only makes it look great but also extends its lifespan. Dirt and grime can accelerate wear on components, so regular bike cleaning is essential. You don’t need a lot of fancy equipment to get started; just a few basic supplies will do the trick.
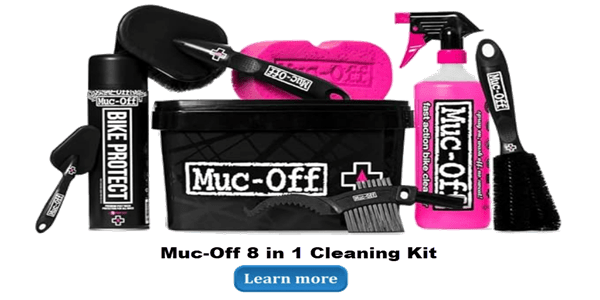
First, gather your supplies: a bucket, warm water, mild dish soap, a sponge, soft brushes, and a few rags or microfiber cloths. A bike-specific cleaner can also be handy for tougher spots.
Start your bicycle maintenance by rinsing your bike with a gentle spray of water to remove loose dirt. Avoid using high-pressure water, as it can force grit into bearings and other sensitive areas.
Mix a small amount of dish soap in the bucket of warm water. Using the sponge, gently wash the frame, wheels, and components. Pay special attention to areas that collect the most grime, like the chain stays and bottom bracket.
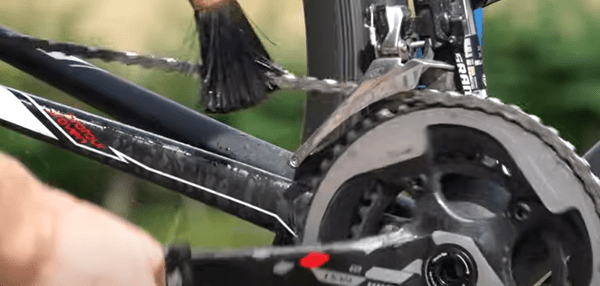
Use soft brushes to reach into tight spots, like the cassette and derailleurs. For the chain, use a chain-cleaning tool or a brush to scrub away the dirt. Once everything is soapy and scrubbed, rinse the bike thoroughly with clean water.
Dry the bike with a clean rag or microfiber cloth. Make sure to get into all the nooks and crannies to prevent rust and water spots. After drying, apply a light coat of bike-specific lubricant to the chain and any other moving parts to keep them running smoothly.
Deep Cleaning for Tough Grime
Sometimes, your bike needs more than just a basic wash. For those tougher cleaning jobs, a deeper clean is necessary. This is especially true after muddy rides or during the winter months when salt and grime can build up.
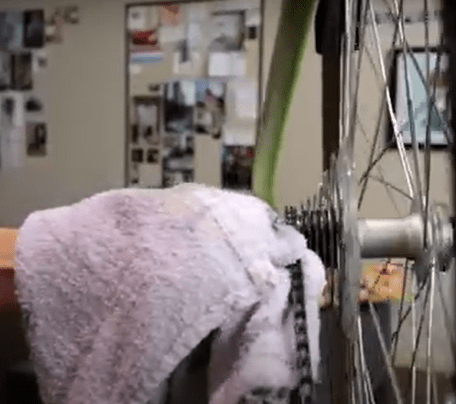
Start by removing the wheels to give you better access to all parts of the bike. Clean the wheels separately, paying close attention to the hubs and spokes. For deep cleaning the drivetrain, consider using a degreaser. Apply the degreaser to the chain, cassette, and chainrings, and let it sit for a few minutes to break down the grime.
Use a brush to scrub the drivetrain components thoroughly. Chain-cleaning tools can also be very effective here, allowing you to clean the chain without removing it from the bike. Once the drivetrain is clean, rinse it with water and dry it completely.
For the frame and other components, a bike-specific cleaning spray can help remove stubborn dirt and grease. Spray it on, let it sit for a minute, and then scrub with a brush. Be sure to rinse thoroughly afterward.
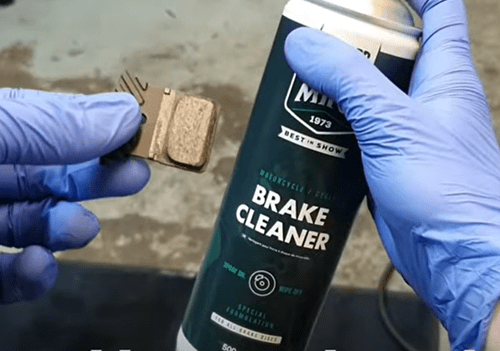
Don’t forget to clean the brake pads and rims or rotors to ensure optimal braking performance. Use isopropyl alcohol to clean disc rotors, as it evaporates quickly and leaves no residue.
After deep cleaning, re-lubricate the chain and any other moving parts. Check the brake pads and tires for any signs of wear that may have been hidden by dirt. This is also a good time to inspect the frame and components for any damage.
Regular deep cleaning keeps your bike in peak condition, ready for any ride. In the next section, we’ll delve into bicycle maintenance, focusing on how to keep your bike running smoothly and efficiently.
Lubrication: The Key to a Smooth Ride
When and Where to Lubricate
Lubrication is a crucial part of bicycle maintenance. It ensures your bike runs smoothly and helps protect moving parts from wear and tear. Knowing when and where to apply lubricant can make a significant difference in your bike’s performance and longevity.
The chain is the most obvious part of the bike that requires regular chain lubrication. After cleaning your bike, make sure the chain is dry before applying a new layer of lubricant.
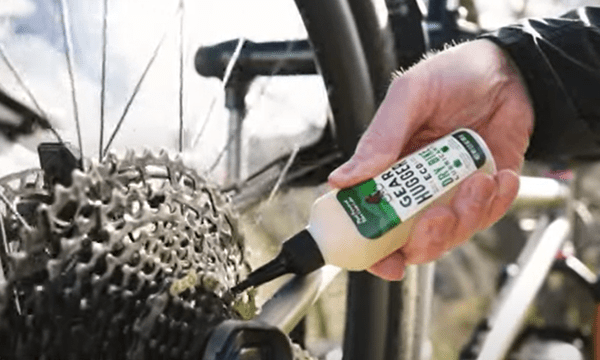
Apply a drop of lube to each link while slowly rotating the pedals backward. Let the lube sit for a few minutes, then wipe off any excess with a clean cloth to prevent dirt from sticking.
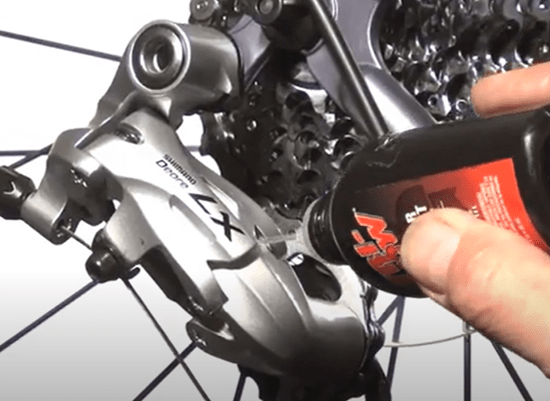
Don’t forget the derailleurs. Both the front and rear derailleurs have pivot points that can benefit from a small amount of lubricant. Apply a few drops to each pivot point and work the derailleurs through their full range of motion to ensure even distribution.
Brake and shift cables also need occasional lubrication, especially if your bike is exposed to wet or dirty conditions. Apply a light lubricant along the length of the cables, then operate the brakes and shifters to help the lube penetrate the housings.
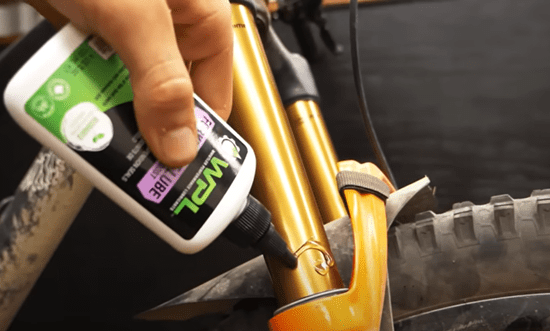
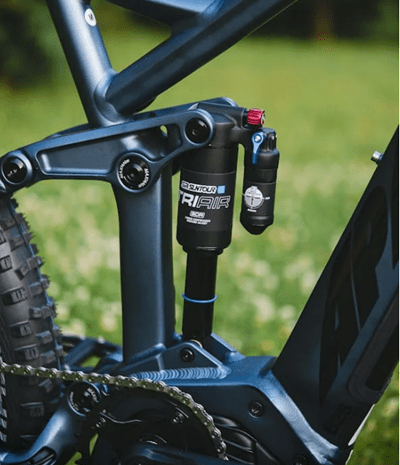
If you have a bike with a suspension fork or rear shock, check the manufacturer’s recommendations for lubrication. Some parts may require specific lubricants or maintenance intervals to keep them performing optimally.
Pedals and cleats can also benefit from occasional lubrication. A few drops on the pedal bearings and cleat interfaces can prevent squeaks and improve performance. Be careful not to get any lubricant on the braking surfaces or brake pads, as this can severely impact braking performance.
Choosing the Right Lubricant
Selecting the right lubricant for your bike can be a bit daunting, given the variety of products available. The type of lubricant you choose depends on the conditions you typically ride in and the specific components you are maintaining.
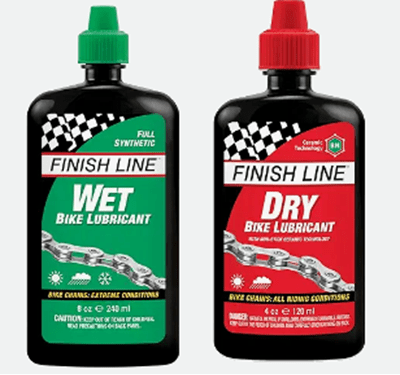
For chains, there are generally two types of lubricants: wet and dry. Wet lubricants are designed for wet, muddy, or snowy conditions. They stick to the chain better and provide excellent rust prevention. However, they can attract dirt and grime, so regular cleaning is necessary.
Dry lubricants, on the other hand, are better suited for dry and dusty conditions. They don’t attract as much dirt but may need to be reapplied more frequently. Known as “dry lubricants” because they go on wet but dry quickly to leave a protective, non-sticky film, they are perfect for keeping your chain clean in dry environments.
Examples of dry lubricants include:
Finish Line Dry Teflon Lube: A versatile dry lubricant that uses Teflon fluoropolymer to reduce friction and repel dirt.
Muc-Off Dry Lube: Ideal for dry and dusty conditions, this biodegradable lube offers long-lasting protection.
Rock N Roll Gold: Known for its ability to keep chains clean and smooth, this dry lubricant provides excellent performance in dry environments.
Squirt Long Lasting Dry Lube: A wax-based lubricant that provides a clean, long-lasting solution, keeping your drivetrain running smoothly without attracting much dirt.
Ceramic lubricants are a high-performance option, offering lower friction and longer-lasting protection. These are ideal for riders looking for the best efficiency and performance, although they can be more expensive than standard lubes.
For derailleur pivots and cables, a lightweight oil or spray lubricant works well. These products penetrate easily and provide smooth operation without attracting too much dirt.
If you have suspension components, use a lubricant specifically designed for suspension forks and shocks. These lubes are formulated to reduce friction and prevent wear on seals and stanchions, keeping your suspension smooth and responsive.
Remember, more is not always better. Over-lubricating can attract dirt and cause a buildup that hampers performance. Apply lubricant sparingly and wipe off any excess to keep your bike running clean and smooth.
Brakes: Ensuring Reliable Stopping Power
Adjusting Rim Brakes for Optimal Performance
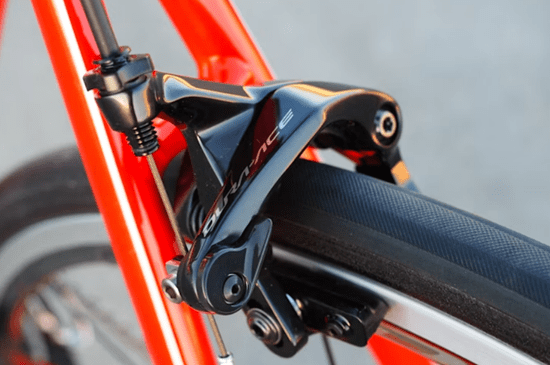
Rim brakes, common on many road and mountain bikes, are effective and relatively simple to maintain. Ensuring they are properly adjusted can make a significant difference in your bike’s stopping power and safety.
Start by checking the brake pads. They should be aligned with the rim, not touching the tire, and making even contact when the brake lever is pulled. If the pads are worn down to the wear line, it’s time to replace them. To adjust the pads, loosen the mounting bolt, position the pad correctly, and then tighten the bolt securely.
Next, inspect the brake cable tension. When you squeeze the brake lever, there should be about a 1-2 cm gap between the lever and the handlebar.
If it feels too loose or too tight, you can adjust the cable tension using the barrel adjuster located where the cable enters the brake lever. Turn it counterclockwise to increase tension and clockwise to decrease it.
Check the brake calipers to ensure they are centered over the rim. If one pad touches the rim before the other, use a 5mm Allen key to adjust the positioning. Most calipers have a centering screw that allows you to fine-tune their alignment.
Regularly clean the rims and brake pads to remove any debris or grime that could reduce braking efficiency. A simple wipe with rubbing alcohol can keep them performing at their best.
Maintaining and Adjusting Disc Brakes
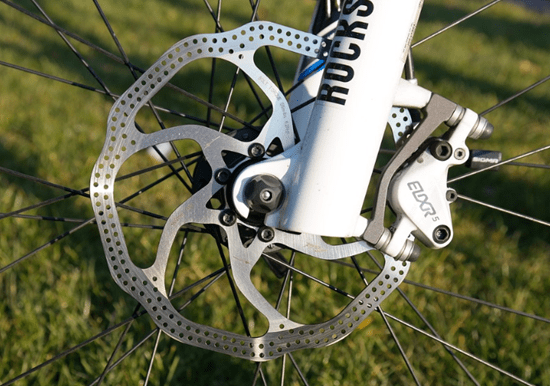
Disc brakes, whether mechanical disc brakes or hydraulic disc brakes, offer superior stopping power, especially in wet and muddy conditions. Proper maintenance and adjustment are key to keeping them performing optimally.
For mechanical disc brakes, start by checking the brake pads. Just like rim brakes, disc brake pads wear down over time and need replacing when they become too thin. To inspect them, remove the wheel and use a flashlight to check the pad thickness. Replace if necessary.
Adjust the cable tension using the barrel adjuster at the brake lever. The brake lever should have a firm feel without pulling all the way to the handlebar.
If needed, adjust the pad distance using the adjustment screws on the caliper. This ensures the pads are close enough to the rotor for effective braking but not rubbing when not in use.
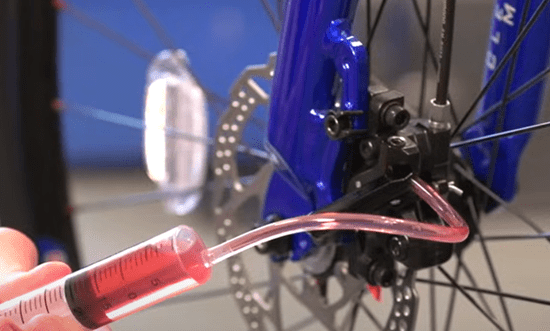
Hydraulic disc brakes require bleeding periodically to remove air bubbles from the system. If you notice spongy brake levers or reduced braking power, it might be time for a bleed. Follow the manufacturer’s instructions carefully or take it to a professional if you’re unsure.
Clean the rotors regularly with isopropyl alcohol to remove any contaminants that can affect braking performance. Avoid touching the rotors with your fingers as oils can transfer and reduce efficiency.
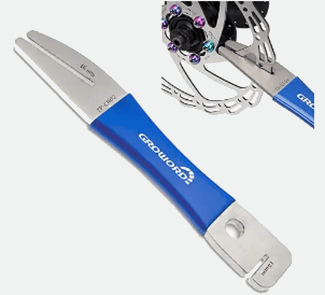
Check the rotor for trueness. A bent rotor can cause rubbing and reduced braking power. Use a rotor truing tool to gently bend it back into shape if necessary.
Maintaining your brakes ensures you have reliable stopping power in all conditions. This not only keeps you safe but also enhances your riding confidence. In the next section, we’ll delve into tires and wheels, focusing on keeping you rolling smoothly and efficiently.
Tires and Wheels: Keeping You Rolling
Checking Tire Pressure and Tread
Tire pressure and tread condition play a crucial role in your bike’s performance and safety. Properly inflated tires ensure better handling, increased efficiency, and reduced risk of flats.
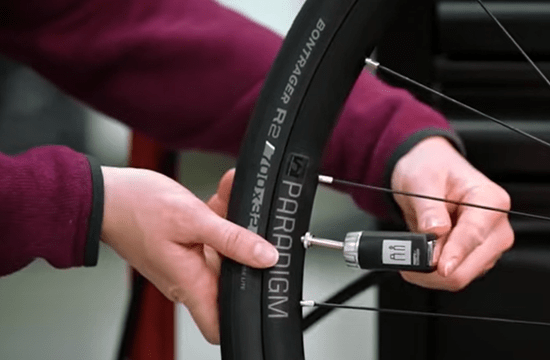
Start by checking your tire pressure regularly. Most tires have the recommended pressure range printed on the sidewall. Use a reliable tire pump with a pressure gauge to inflate your tires within this range.
For road bike maintenance, the pressure typically ranges from 80 to 130 psi, while mountain bike maintenance usually requires 30 to 50 psi.
Under-inflated tires can make your ride sluggish and increase the chance of pinch flats. Over-inflated tires, on the other hand, can lead to a harsh ride and reduced traction.
Next, inspect the tire tread. Look for any signs of wear, such as bald spots, cracks, or cuts. If the tread is significantly worn down or if you see threads showing through the rubber, it’s time to replace the tire.
Regularly check for embedded debris like glass, thorns, or sharp stones, which can cause punctures. Remove any debris carefully to avoid damaging the tire further.
Also, ensure the tires are seated properly on the rims. Check for any bulges or irregularities that could indicate a problem with the tire bead or rim.
Truing Wheels and Fixing Spokes
Keeping your wheels true (straight) and your spokes properly tensioned is essential for a smooth ride. A wheel that is out of true can cause handling issues and uneven tire wear, while loose or broken spokes can lead to more serious wheel damage.
To check if your wheels are true, lift your bike and spin each wheel. Watch the rim as it spins, looking for side-to-side wobbling. If you notice any wobble, your wheel needs truing.
Minor adjustments can be made with a spoke wrench. Tighten or loosen the spokes opposite the wobble to bring the wheel back into alignment. For more significant issues or if you’re unsure, it’s best to take your wheel to a professional bike repair shop.
Inspect the spokes regularly. They should all be tight and evenly tensioned. If you find any loose or broken spokes, they need to be replaced immediately. Riding with a broken spoke can cause additional stress on the wheel, leading to further damage.
To fix a broken spoke, remove the wheel and tire. Thread a new spoke into the hub and rim, following the same pattern as the other spokes.
Use a spoke wrench to tension the new spoke, then true the wheel as needed. It’s a good idea to check all the spokes’ tension and adjust as necessary to ensure the wheel remains strong and true.
Regularly maintaining your tires and wheels ensures a smoother, safer ride. Proper tire pressure and tread, combined with well-tensioned and true wheels, keep you rolling efficiently and comfortably. Next, we’ll explore how to care for your chain and drivetrain to keep your gears running smoothly.
Drivetrain: Keeping the Gears Running Smoothly
Adjusting Derailleurs and Gears
Ensuring your derailleurs and gears are properly adjusted is essential for smooth and reliable shifting. While we’ve already covered chain lubrication, let’s now focus on how to adjust your derailleurs to keep your drivetrain in peak condition.
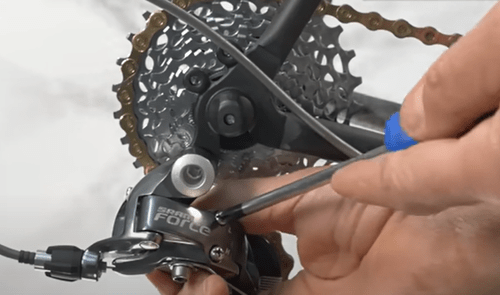
Start with the rear derailleur. Begin by shifting to the smallest cog. Check the alignment of the derailleur’s jockey wheel with the cog. If it’s not perfectly aligned, use the barrel adjuster on the derailleur to fine-tune the positioning. Turn the barrel adjuster counterclockwise to move the derailleur closer to the wheel and clockwise to move it away.
Next, adjust the high and low limit screws. These screws control the range of motion for the derailleur, preventing the chain from falling off the cogs. Shift to the largest cog and adjust the low limit screw until the derailleur is aligned with the cog. Do the same with the high limit screw when the chain is on the smallest cog.
Once the limit screws are set, fine-tune the indexing. Shift through all the gears, ensuring each shift is crisp and precise. If the chain hesitates or jumps between gears, use the barrel adjuster to make small adjustments. Turning the barrel adjuster counterclockwise tightens the cable tension, while turning it clockwise loosens it.
The front derailleur adjustment follows a similar process. Shift to the smallest chainring and align the derailleur cage with the chain. Use the barrel adjuster to fine-tune the cable tension.
Adjust the low limit screw to ensure the derailleur doesn’t push the chain off the inside of the chainring. Shift to the largest chainring and adjust the high limit screw to prevent the chain from overshooting.
For smooth gear shifting across the front gears, make sure the derailleur cage is parallel to the chainrings. If it’s not, loosen the derailleur clamp bolt and adjust its position. Tighten the bolt once the cage is properly aligned.
Additionally, check for chain rub on the front derailleur. If you notice any rubbing, adjust the trim by slightly altering the derailleur position using the shifter’s micro-adjust feature, if available.
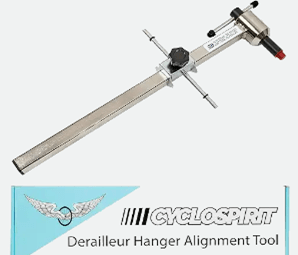
Regularly inspect the derailleur hanger. A bent hanger can cause poor shifting performance. Use a derailleur hanger alignment tool to check and correct any misalignment.
Properly adjusted derailleurs and gears ensure smooth and reliable shifting, enhancing your cycling performance. Next, we’ll delve into maintaining your electronic shifting system, exploring high-tech tips for keeping everything running smoothly.
Electronic Shifting: High-Tech Maintenance Tips
Updating Firmware and Battery Care
Electronic shifting systems, like Shimano Di2 or SRAM eTap, offer precise and reliable gear changes, but they also require regular maintenance to perform optimally. Keeping your firmware updated and taking good care of your batteries are essential aspects of maintaining these high-tech systems.
Start your bicycle maintenance with firmware updates. Manufacturers periodically release firmware updates that can enhance performance, fix bugs, and sometimes add new features. Connect your bike’s system to the manufacturer’s software via a USB interface or Bluetooth.
Follow the instructions provided by the software to check for and install any available updates. Regularly updating your firmware ensures your system runs smoothly and benefits from the latest improvements.
Battery care is another critical component. Make sure your batteries are always charged, especially before long rides. Lithium-ion batteries, commonly used in electronic shifting systems, have a long life but need proper care to maintain their performance.
Avoid letting the battery completely drain, as this can reduce its lifespan. If your bike will be unused for an extended period, store the battery at around 50% charge in a cool, dry place.
Regularly inspect the battery connections and contacts for dirt and corrosion. Clean them with a soft cloth and a bit of rubbing alcohol if necessary. Ensure that the battery is securely attached to its mount to prevent disconnection or damage while riding.
Troubleshooting Common Issues
Even with proper care, electronic shifting systems can occasionally encounter issues. Knowing how to troubleshoot common problems can save you time and frustration.
One common issue is slow or unresponsive shifting. This can often be resolved by checking the battery charge. If the battery is low, recharge it fully. If the battery is charged and the issue persists, ensure all connections are secure. Loose connections can disrupt the communication between components.
Another common problem is inconsistent shifting performance. This might be due to firmware needing an update. As part of your bicycle maintenance, check the manufacturer’s software for the latest firmware version and update as necessary. Additionally, inspect the wiring for any signs of damage or wear. Damaged wires should be replaced to restore proper function.
Sometimes, the system may fail to shift altogether. In this case, perform a system reset. For Shimano Di2, this involves disconnecting and reconnecting the battery. For SRAM eTap, you can remove and reinsert the batteries in the shifters and derailleurs. If the problem continues, consult the manufacturer’s troubleshooting guide or seek professional help.
Calibration issues can also affect performance. Ensure that your derailleurs are correctly calibrated. Follow the manufacturer’s instructions to reset and calibrate the derailleurs if needed. This process usually involves positioning the derailleur in a specific gear and using the adjustment buttons to fine-tune the alignment.
Regularly checking for and addressing these common issues ensures your electronic shifting system remains reliable and efficient. In the next section, we’ll explore how to inspect your bike’s frame and fork for damage, ensuring the structural integrity of your ride.
Frame and Fork: Inspecting for Damage
Checking for Cracks and Rust
Your bike’s frame and fork are its backbone, providing structural integrity and ensuring safe rides. Regularly inspecting these components for cracks and rust is crucial for maintaining your bike’s durability and performance.
Start by thoroughly cleaning your bike. Dirt and grime can hide small cracks and rust spots. Once clean, carefully inspect the frame and fork, paying close attention to joints, welds, and areas subjected to stress, such as the bottom bracket, head tube, and seat stays. Use a bright light and magnifying glass if necessary to spot any tiny cracks.
If you find a crack, even a small one, it’s essential to address it immediately. Cracks can grow over time, compromising the bike’s structural integrity and leading to catastrophic failure. Depending on the material and location of the crack, you may need to have the frame professionally repaired or replaced.
Rust is another enemy, especially for steel frames. As part of your bicycle maintenance, check for rust spots, particularly in areas where paint or coating has chipped away. Surface rust can often be removed with a wire brush or sandpaper, followed by a touch-up of paint or protective coating. However, extensive rust that has penetrated deeper may require more significant repair or frame replacement.
Proper Care for Different Frame Materials
Different frame materials require specific care to keep them in optimal condition. Understanding the needs of your bike’s material can help extend its lifespan and maintain its performance.
Steel Frames: Steel is durable and provides a comfortable ride, but it’s prone to rust. Regularly inspect for rust and keep the frame clean and dry. After riding in wet conditions, wipe down the frame and apply a light coat of frame protectant or wax to prevent rust. If you store your bike in a humid environment, consider using a rust inhibitor inside the frame tubes.
Aluminum Frames: Aluminum is resistant to rust but can corrode when exposed to salt or chemicals. As part of your bicycle maintenance, after rides in coastal areas or winter conditions where roads are salted, rinse your bike thoroughly with fresh water to remove any corrosive substances. Regularly inspect the welds for any signs of fatigue or cracking.
Carbon Fiber Frames: Carbon fiber is lightweight and strong, but it’s vulnerable to impact damage. Regularly inspect for cracks or delamination, especially after a crash or hard impact.
Carbon frames don’t rust, but they can degrade if exposed to certain chemicals. Use mild soap and water for cleaning, and avoid harsh solvents. Also, avoid clamping your bike too tightly in a work stand, as this can damage the carbon fibers.
Titanium Frames: Titanium is incredibly durable and resistant to corrosion, making it relatively low-maintenance. However, it’s still important to inspect for cracks and damage, especially at welds and joints. Clean the frame with mild soap and water, and occasionally polish it to maintain its appearance.
No matter the material, regular inspections and proper care are vital for maintaining your bike’s frame and fork. By addressing any issues promptly and following the specific care guidelines for your frame material, you can ensure your bike remains safe and reliable for many rides to come.
Next, we’ll look at how to maintain your saddle and handlebars, ensuring comfort and control on every ride.
Saddle and Handlebars: Comfort and Control
Adjusting Saddle Height and Angle
Ensuring your saddle is correctly adjusted is crucial for both comfort and efficiency. An improperly adjusted saddle can lead to discomfort, pain, and even injury over long rides.
Good bicycle maintenance should start with the saddle height. The optimal height allows a slight bend in your knee when the pedal is at the lowest point of its rotation. To find this, sit on your bike with your heel on the pedal and pedal backward. Your leg should be fully extended at the lowest point.
If it’s too bent, raise the saddle; if you’re reaching or rocking your hips, lower it. Use the seat post clamp to make adjustments, ensuring it’s tight enough to prevent any slipping.
Next, adjust the saddle angle. Most riders find a level saddle most comfortable, but small adjustments can make a big difference. If you experience discomfort or numbness, try tilting the saddle slightly downward or upward. Be cautious with adjustments; even a few degrees can change your comfort level dramatically. Use a spirit level to ensure accuracy, and test ride after each adjustment.
Also, consider the saddle’s fore-aft position. This adjustment helps with balance and power transfer. With the crank arms horizontal, your forward knee should be directly above the pedal axle. Adjust the saddle forward or backward using the saddle rail clamps.
Maintaining Handlebar Tape and Grips
Handlebar tape and grips are essential for control and comfort. Over time, they can wear out, become sticky, or lose their cushioning effect, impacting your ride quality.
For drop bars with handlebar tape, start your bicycle maintenance by inspecting the tape for wear and tear. If the tape is peeling, torn, or has lost its cushioning, it’s time to replace it. Begin by removing the old tape, starting at the ends and working towards the stem. Clean the handlebars thoroughly to remove any residue.
When wrapping new tape, start from the ends of the bars, working your way toward the stem. Overlap each wrap slightly to ensure complete coverage and secure the end with electrical tape. Finish by installing new bar end plugs. High-quality handlebar tape not only improves grip but also absorbs vibrations, reducing hand fatigue.
For flat or riser bars with grips, check for signs of wear or looseness. Worn grips can cause your hands to slip, reducing control. To replace grips, cut off the old ones carefully with a utility knife. Clean the handlebars and apply a bit of rubbing alcohol or grip adhesive to help slide the new grips on. Ensure they are fully seated and secure before riding.
Consider using ergonomic grips if you experience hand or wrist pain. These grips are designed to provide better support and reduce pressure points.
Properly maintained saddle and handlebars significantly enhance your riding experience by providing comfort and control. By regularly checking and adjusting these components, you can ensure that every ride is enjoyable and pain-free.
In the next section, we’ll wrap up with a summary of the key bicycle maintenance points to keep your bike in top condition for problem-free riding.
Recap of Key Bicycle Maintenance Points
Maintaining your bike is essential for ensuring a smooth, safe, and enjoyable riding experience. By following a few key maintenance practices, you can keep your bike in top condition and avoid unexpected problems on the road or trail.
First, regularly check your tire pressure and tread. Properly inflated tires enhance performance and prevent flats, while inspecting the tread for wear and debris ensures you’re not caught off guard by a sudden puncture.
Next, keep your wheels true and spokes tight. A wobbling wheel can lead to poor handling and uneven tire wear. Regularly inspecting and adjusting your spokes ensures your wheels stay strong and straight.
Lubrication is critical. We’ve discussed chain lubrication already, but for proper bicycle maintenance remember to also lubricate derailleur pivots, cables, and any other moving parts. Use the appropriate lubricant for your riding conditions to keep everything running smoothly.
Brakes are crucial for cycling safety. Adjusting your rim brakes and maintaining your disc brakes ensures reliable stopping power. Regularly check for pad wear and keep your braking surfaces clean.
For electronic shifting systems, keep your firmware updated and take good care of your batteries. Troubleshoot common issues promptly to maintain precise and reliable shifting.
Inspect your frame and fork regularly for cracks and rust. Different frame materials require specific care, so follow the guidelines for your bike’s material to prevent damage and extend its life.
Adjust your saddle height and angle for comfort and efficiency. Properly maintained handlebar tape and grips enhance control and reduce fatigue, ensuring a comfortable ride.
By incorporating these bicycle maintenance practices into your routine, you can enjoy problem-free riding and extend the lifespan of your bike. Regular inspections and adjustments not only enhance performance but also keep you safe and comfortable on every ride. Happy cycling!
If you enjoyed our blog on Bicycle Maintenance, don’t miss out on more bicycle goodness! Visit our website at classicjapanesebicycles.com for an extensive collection of timeless Japanese bikes and their unique stories. Plus, check out our YouTube channel, Bicycle Restoration Man, for detailed restoration videos and showcases of our finished projects. Subscribe and join our community of bike enthusiasts!
 |
 |
We earn from qualified Amazon purchases with NO cost to you. ANY item that you need or were going to purchased anyway through any of our links, helps support this site. Thank you for your support!


